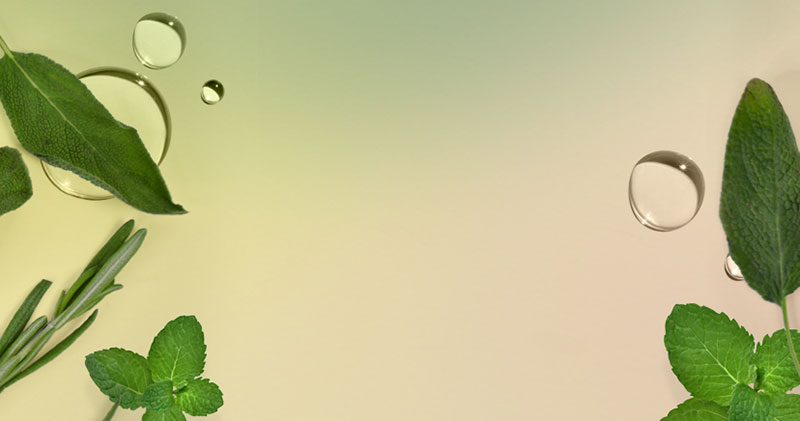
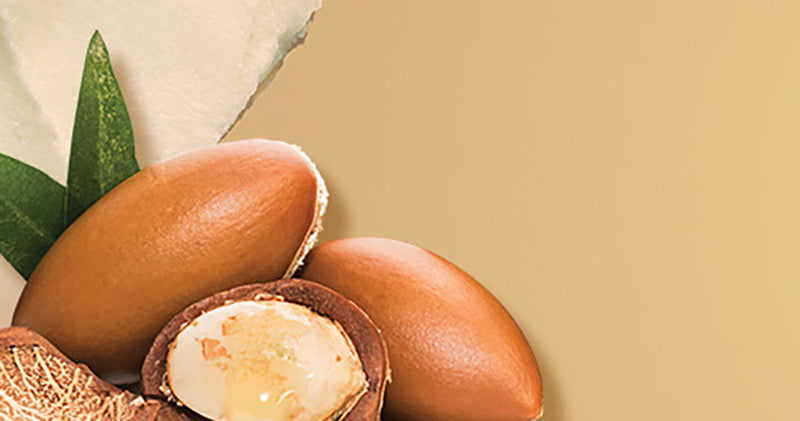
African Pride Hair

Get Stylin: How to Use Miracle Pudding & Curling Custards
Whoever named textured hair products must have been majorly hungry. Butters, puddings, custards, creams… it’s enough to conjure up images of fancy dessert trays and make you hungry too. Styling miracle puddings and curling custards are indeed treats, just in a different way. These hair care products are incredible treats for your natural tresses, especially if you have tighter textures or 4A-4C type hair. With so many styling products and new options coming on the market every day, it can be helpful to better understand exactly what each formula does and how it can benefit your unique hair type. Whether you’ve been wearing weaves and wigs your entire adult life or diligently tend to your natural curls and coils, it’s always good to give yourself a little hair care refresher course. Especially with so many trendy and sometimes gimmicky products hitting shelves. Every step of your natural hair care routine is important, but puddings and custards tend to get overlooked despite how vital they are to the overall health and appearance of your curls. So which formula and product should you look for and what’s the best way to use a styling custard or pudding? Don’t worry. We’re breaking down the importance of each plus, some helpful tips and tricks to get the most out of your favorite styling product. Discover more about each of these formulas below and maybe grab a snack so you don’t get too hungry while reading this. What’s a Styling Pudding? A curly pudding typically comes in a tub and has the texture of whipped cream. Puddings can be used purely as hair moisturizers, styling aids, or a mixture of both. They’re typically formulated with a combination of nourishing butters and natural oils to provide moisture to drier, tighter textures and hair types. The magic of a hair pudding is its ability to nourish hair while transforming tighter coils into shiny, elongated curls. The creamy consistency of puddings are easy to use so they’re the perfect styling aid if you’re just beginning to transition to going natural. What’s a Curling Custard? A curling custard also comes in a tub and typically has a thicker consistency than styling puddings. A custard’s texture is sometimes similar to a gel but don’t get those mixed up. While a gel can be severely drying and damaging as they typically contain alcohol, a custard is made from nourishing ingredients like oils and butters. Natural hair custards can help tame frizz while adding a shiny luster to your curls. The great thing about custards is that you can typically use them right after showering whereas you should wait until your hair is damp to use a pudding. What’s the Best Formula for my Hair? The biggest difference between pudding and custards is their texture and consistency. The great thing about both these formulas is that they work on many different types of hair textures. However, the way you use them will be different depending on your individual hair type and curl pattern. Textured hair is incredibly unique, which means it can be difficult to accurately determine exactly what will work best for your tresses. Like with any hair product, you’ll need to do a little trial-and-error to see what works best for you and your curls. Puddings and custards are both great for tighter textures and type 4A-4C hair. This is because tighter textures are usually drier and require more moisture and hold in their styling products. If you have a looser curl pattern or find your hair isn’t as dry as type 4 hair tends to be, you can still use puddings and custards but opt to use slightly less product when you style your hair. With many formulas being lightweight and nourishing however, you really can’t go wrong with either one. How do I Use African Pride Miracle Pudding? This lightweight whipped cream is a fabulous styling aid that can be used for setting fluffy finger-styles, coils, two-strand twists, braid-outs and pony puffs. Creamier and lighter than custard, puddings can create softer styles, especially when applied directly after leave-in conditioner. A twist-out is our favorite hairstyle to get using a styling pudding, especially for tighter textures and coils. To use, start with damp or dry hair and gently comb through a generous amount of miracle pudding through your hair, section by section, from roots to ends. After combing through strands, go through elongating and stretching your curls until you’ve reached the perfect definition. The nourishing ingredients will help hydrate your curls while setting them for continuous wear in your favorite style. This helpful bouncy curls tutorial shows how to get the best twist out using our Bouncy Curls Pudding. How do I Use Shea Miracle Curling Custard? If you’re hesitant to use a custard for the first time reach for a lightweight formula like our Shea Miracle Curling Custard. This curl styling custard is non-sticky and non-flaky, making it perfect for natural hair transitions and custard newbies. It’s unique blend of nourishing shea butter and herbal oil extracts gives curly strands amazing manageability, softness, and shine. Plus, it helps define curls and coils, tame frizz, and elongate your curls. Because curling custards are great frizz tamers and curl definers, they are best used after showering on freshly washed hair for a quick and easy wash and go style. There’s a misconception that you can’t do a ‘wash and go’ style on type 4 hair, and that couldn’t be further from the truth, especially with a curly custard. To use make sure your hair is clean and conditioned and damp—not soaking wet. Divide your hair into sections and apply a generous amount of custard from your roots to ends, gently stretching curls as you go. This formula is also great for finger-styling so try carefully twisting and twirling strands around your fingers. Once you’re happy with your curl definition set your look by air drying or sitting under a dryer for up to 25 minutes. You can also use a hair dryer with a diffuser attachment on a low setting. This super versatile product also works great to smooth your edges and tame flyaways, making it a great finishing touch for every kind of hairstyle. If you’ve been blessed with curly hair you’ve more than likely been confused by the amount of curling creams, oils, puddings, and custards on the shelf. When it comes to hair pudding vs. custards one isn’t better than the other. However, one might be better for you and your unique hair type. Ultimately, custard will give a lighter hold but can be used on wet hair for an easy wash & go look and will help your curls clump together better. Puddings on the other hand, will give your curls a bit more bounce and hydration and are better when you’re creating a twist-out or braided look. Either way you’re gonna look fabulous. Happy styling! DISCLAIMER: We endeavor to always credit the correct original source of every image we use. If you think a credit may be incorrect, please contact us at care@africanpride.com
Learn more
How to Safely Blow Dry Natural Hair Without Damage
When it comes to caring for your natural hair, it can be tempting to take the easy way out. While shortcuts might save you a little bit of time at the moment, you’ll usually end up regretting it later. Think about it like this, taking off your make-up after a long day is especially annoying, but it’s much better than waking up with breakouts and stained pillowcases. Well, the same goes for your hair care. We get it. There are always a million dos and don’ts of natural hair care floating around internet forums and social media and these can be overwhelming. While there are always guidelines and best practices to ensure your unique hair type is taken care of in the best way possible, we promise it’s not as daunting as it may seem. One of the fundamentals in caring for your unique hair type is understanding how heat impacts it. As you probably know, natural hair has a tendency to be drier and more susceptible to damage and breakage, especially when wet. That’s why it’s important to keep your locks hydrated with a nourishing formula like our African Pride Moisture Miracle Leave-In Spray or African Pride Shea Butter Leave-In Conditioner. To maintain the integrity of your curls we always recommend you air dry as much as possible. This way your strands stay healthy and hydrated and you aren’t messing with your unique natural curl pattern. We understand however, that sometimes you don’t have the time or luxury of air drying your hair. Blow drying is certainly a much faster option and makes styling your curls much quicker and easier. Plus, going to bed with wet hair can be equally as damaging, not to mention it will be very cold and uncomfortable. On the occasion that you do decide to blow dry your hair, be sure to take extra precautions to make sure your tresses remain healthy, hydrated and intact. To blow dry your natural hair the safe way, follow our six expert steps below. Plus, learn what products to look for and how best to use them for healthy, damage-free natural hair. Step 1: Cleanse & Detangle Your Natural Hair Before you even think about picking up that blow dryer, make sure your strands are in the best possible condition to receive heat. It’s important that you only blow dry hair when it’s clean, conditioned, and detangled. Start by giving your hair a 15-30 minute soak with our hydrating Moisture Miracle Pre-Shampoo. This formula will remove tangles, smooth strands and leave hair super soft and manageable. Next, gently wash strands with a moisturizing shampoo and conditioner. Once hair is properly washed and detangled, grab a soft t-shirt or microfiber towel and remove any excess water from hair so that it doesn’t drip during blow drying. Step 2: Moisturize With a Shea Butter Leave-in Conditioner Once hair is clean and conditioned, go ahead and give it another dose of much-needed moisture. Pre-treating or deep conditioning hair can do a lot to protect it throughout the blow drying and styling process. Deep conditioning strengthens, softens, and moisturizes natural hair, while protein treatments focus primarily on strengthening strands so they can withstand heat. Applying a nourishing leave-in conditioner will also help tame frizz, enhance body and shine, and eliminate dryness. To use our African Pride Shea Butter Leave-In Conditioner apply a generous amount of product in the palms of your hands. Smooth onto wet or damp hair, working from roots to ends. If you want to achieve a tighter curl pattern allow hair to air dry a bit before using. For looser curls, blow dry while twisting curls. For straighter styles blow dry while gently brushing with a wide-toothed comb. Step 3: Apply a Heat Protectant It’s essential that you give your hair as much protection as possible in order to shield your curls and coils against heat. Look for a keratin-based heat protectant like this Black Castor Miracle Heat Protectant Spray. The spray’s nourishing keratin complex and black castor oil blend simultaneously provides 400°F heat protection, blocks humidity, adds shine and helps tame frizz. Before you use a blow dryer or straightener, spray through damp or dry hair and comb through. Step 4: Section Damp Hair With damp (never wet) hair, separate your hair into 3-5 sections depending on length and density. Secure each section with clips to keep them apart. Blow drying one section at a time will allow you to dry hair more efficiently while ensuring you don’t overheat the other sections. Similarly, be sure to set your blow dryer to a low setting. If you have a diffuser or concentration attachment with your blow dryer, use it to focus the heat. Step 5: Use the Tension Method to Blow Dry Blow drying with the tension method will ease the strain of manipulation on your hair while also helping to reduce any breakage and damage that can come from applying heat. First, grab one section of hair, holding it gently but taught from the bottom, and keep it stretched out. Then carefully run the blow dryer up and down the hair section. Remember what we said about taking hair care shortcuts? The tension method will probably take a little longer to dry your hair but the result is healthier strands. We’d say the extra time is definitely worth it. Step 6: Refresh Curls With Moisture Miracle Leave-in Spray Now that your hair is freshly washed, conditioned, and safely blow dried, you can put it into your favorite protective hairstyle. Before you get styling however, it’s always a good idea to give your curls another dose of moisture. Applying a nourishing leave-in conditioner like our African Pride Moisture Miracle Leave-In Conditioner Spray to your scalp and strands will help fight the dryness that comes from using excessive heat. The great thing about this lightweight spray is that it can be used during styling to help soothe and condition hair and as a daily refresher to keep your curls hydrated even when they’re in a protective style. It’s fun to play around with different hairstyles, trying out new looks and fresh trends. Just remember that some of those styles might require a lot of manipulation or applying extra heat. Don’t forget that your curls and coils are precious and require a gentle touch. Heat and manipulation are okay with the proper precautions and only in moderation. So, after you’ve blow dried and styled your hair following these expert steps, make sure the next hairstyle you do is something that will let your hair breathe and regain its natural moisture. DISCLAIMER: We endeavour to always credit the correct original source of every image we use. If you think a credit may be incorrect, please contact us at care@africanpride.com
Learn more
5 Natural Remedies For a Dry, Itchy Scalp
A solid foundation is the key to a strong and stable house. Similarly, the scalp is the foundation of your hair and any crack in that foundation can bring the whole house down. On the positive side, if you take good care of that foundation, it will show. If you dedicate time, good natural hair care products, and attention to maintaining the health of your scalp you’ll be rewarded. If however, your scalp isn’t well taken care of, it will result in dullness and lack of growth. Not to mention the excessive dryness, itchiness, and flakes that you’re also likely to experience. Dryness is the number one cause (and consequence) of scalp irritation. Unfortunately, natural hair is already prone to increased brittleness and dryness since it’s more difficult for moisture to travel down coily and curly hair strands. A dry scalp on textured hair types tends to occur because the follicles are lacking moisture, whether it’s added moisture from products or naturally produced in the form of sebum. When the dryness gets to a certain level the scalp may get itchy and eventually the skin begins to flake off, turning into dandruff. If you’re experiencing any of this, don’t fret! We know it can be irritating, uncomfortable, not to mention embarrassing, but getting itchy scalp relief is more achievable than you might think. Simply switching up your hair care routine and natural hair products, like adding a nourishing dose of our moisture miracle oil or hydrating hair with our coconut oil and honey leave-in conditioner, can make a world of difference. Introducing a few new rituals to your natural hair care routine can relieve your dry, itchy scalp and continue preventing it from happening again in the future. Your curls and coils crave extra moisture and caring for the scalp is the key to keeping your whole head nourished, soft, and shiny. Keep reading to learn more about why you’re suffering from a dry scalp and how to finally get relief with five easy at-home solutions. What Causes a Dry Scalp? Before you start treating your scalp, it’s important to pinpoint the likely causes of its irritation so you can lessen the chances of it ever occurring again later. The root of the problem could be external or internal factors or a mixture of both. Some of the most common internal causes include stress, lack of sleep, medications that cause dehydration, and skin conditions like dermatitis or psoriasis. You can also be genetically predisposed to it or have certain hormonal imbalances that affect the skin and hair. Aging and the excessive consumption of sugar and fats can also impact the production of the sebum that naturally moisturizes the scalp. Some of the typical external causes include cold or dry weather, over-washing, harsh hair products, and environmental pollution. Across the external and internal factors, many of them are things you can’t necessarily fix (you just can’t change your DNA) so it’s important to do your best with the ones you can. Examine your lifestyle and determine which things are reasonable for you to alter like consuming less sugar, taking better care of your health overall, and avoiding harsh ingredients in your hair care products. Easy Natural Remedies For a Dry Scalp In addition to making a few lifestyle changes, ones that will benefit your overall health as well, there are easy things you can do when it comes to caring for your natural hair. Read on to see five easy ways to remedy your dry scalp. Scalp Massages With Moisture Miracle Oil Once you’ve done what you can in terms of preventative measures, the best immediate relief can come from a nice scalp massage. It’s an effective way to increase hydration and deliver that much needed moisture quickly. Grab an oil like our lush African Pride 5 Essential Oils and rub into the scalp with your fingertips in a gentle, circular motion. This is not only therapeutic, alleviating stress and giving you a moment of relaxation, but its unique blend of olive oil, coconut oil, vitamin E, and more greatly benefit the scalp. The massaging movement stimulates the production of your hair’s natural oils, kickstarting it so that it can continuously provide more moisture. The African Pride 5 Essential Oils also deliver a restorative boost that soothes irritation, calms itchiness, and replenishes lost nutrients. However, remember to avoid scratching the scalp with your nails so that you don’t cause more harm than good. Proper Cleaning and Conditioning Washing hair properly is a big factor in your overall scalp health. Products with sulfates, alcohol, or other harsh chemicals can dry out hair and can end up damaging the delicate follicles of the scalp. Our Coconut Oil Shampoo is a gentle cleansing formula that removes dirt and buildup without stripping the hair of its natural oils. The coconut oil deeply penetrates the hair shaft to deliver hydration and the honey seals it in for better retention. This nourishes the scalp with the moisture it’s lacking without damaging the hair’s natural oil production. Following with the Coconut Oil Conditioner compliments the shampoo by adding the intensely restorative benefits of chocolate in the form of natural cacao. Both of these moisture restoring combos are made specifically for textured, curly, and coily hair so they can deliver hydration directly to where it’s desperately needed in the scalp. Even with nourishing products, however, the hair still needs time for its natural oils to replenish themselves so continue to be aware of how often you are cleansing. Moisturizing With Coconut Oil & Honey Leave-in Conditioner The scalp’s lack of moisture is what causes it to be dry, so adding moisture is the best way to fight it. Water itself is moisture, so water-based products deliver the most hydration to the hair. Our African Pride Moisture Miracle Leave-In Conditioner is a lightweight formula that nourishes curls all day long while adding definition and shine. Just applying the moisture however, isn’t quite enough to alleviate your entire dry scalp. Adding a moisture miracle oil in addition to our coconut oil & honey leave-in conditioner is a necessary extra step that seals the moisture into the hair so it can retain it for longer amounts of time. Continue using our essential oils blend or opt for our Hair & Scalp Sealing Oil for the added benefit of tea tree oil’s anti-inflammatory, conditioning, and soothing properties. Either will do the important job of being a sealant to lock in moisture and work against dry scalp all day long. Deep Conditioning Treatments For improved scalp care, the small changes like washing less and using lush leave-in conditioners are important, but there is another step that should be added to your usual hair care regimen. Consistent deep conditioning treatments will pack an extra punch of moisture that is key in the continuous prevention of dry scalp in the future, especially if its causes are things you can’t control. Our Deep Penetrating Conditioner Treatment is exactly the type of intense hydration needed to treat the severity of dry, itchy scalp. It penetrates hair strands to restore moisture where other products fail to. For the first month, do the treatment weekly to alleviate the symptoms of dry scalp. After that, go down to about twice a month to continually ensure the scalp and hair are conditioned and moisturized. Nourishing the Scalp With a Balanced Diet As some causes of dry, itchy scalp are internal, it’s important to pay attention to what’s going on inside the body that may be a culprit. Certain nutrients specifically nourish the skin and hair so if your diet is lacking them it can contribute to dry scalp and dry skin in general. Zinc, Omega-3 fatty acids, Vitamin B, and Vitamin A are all essential for skin health. In addition to taking vitamins, incorporate foods containing these into your diet. Most importantly, make sure you are drinking enough water. This provides the ultimate hydration for your body, skin, and scalp. Dry Scalp Issues: When to See a Doctor A dry, itchy scalp is usually a treatable lack of moisture that can be easily fixed with these natural hair care tips. However, if after exhausting these methods for months you still experience no change in your scalp’s condition, we suggest seeing a doctor. Most likely however, integrating a balanced diet, increasing your water intake, and incorporating these five hair tips will quench your curls thirst for moisture. DISCLAIMER: We endeavour to always credit the correct original source of every image we use. If you think a credit may be incorrect, please contact us at care@africanpride.com
Learn more
Get Stylin: How to Make the Most of Your Curling Cream
We’ve all been there: frozen in the drugstore natural hair care section, starring at all the custards, creams, butters, mousses, and gels. It’s a lot of work trying to decipher what each one is and what they actually do for your unique natural curls and coils. Knowing what curly hair products to use and when isn’t always just about the product, it also depends on your individual hair texture, curl pattern, density, and porosity. As such, there can be a lot of trial and error involved when it comes to trying new products. We get it and we want to help. A good place to start is with a lush formula like our Moisture Miracle Curling Cream to add shine, moisture and definition to curls and coils. Unfortunately, no matter how great a product might be, if you’re not using natural hair curling creams in the most optimal way, you won’t be getting the best results. Make sure you are getting the most out of your curling cream with our expert tips and tricks. Plus, learn more about what differentiates curling creams from other textured hair products and why it’s important to add one to your natural hair care arsenal. What is Curling Cream? When it comes to categorizing natural hair products there are certain “families” that exist. These are broad groupings such as cleansers, conditioners, moisturizers, stylers, and serums. For example, things like gels, pomades, and mousses generally fall under stylers. Hair milks, butters, and hydrating mists are usually considered moisturizers. The lines are often blurred when it comes to creams, custards, and puddings because many of them are highly moisturizing stylers, intended to both hydrate and hold your curls. Each product’s thickness, texture, and water content can influence the balance between styler and moisturizer. Curling creams with hold are often used as gels, but their consistency and intense hydration actually makes them closer to conditioners. Both creams and gels coat the hair to set styles and seal in moisture, but gel forms a stronger cast around each strand. That’s why hair gels often give your strands that unpleasant crunchy texture. Creams however, give hair a more thin, flexible hold to keep curls and coils soft and bouncy. Creams also condition and moisturize the hair shaft from inside out, taming frizz and smoothing cuticles to prevent tangling. Why do I Need Curling Cream? What makes hair creams so well, creamy, is the combination of oil and water. Just as you need to moisturize your skin to keep it from getting ashy or flaky, your hair needs the same TLC. This is especially true for type 3 and type 4 curly girls since our strands tend to get super dry and need as much nourishment as possible. In addition to providing deep hydration, the purpose of a curl cream is to define your unique curl pattern. Actually, they don’t just define but enhance your curls to make them the very best they can be. A curling cream is the ideal mixture of moisture and hold to style and refresh dry textures like curls and coils while simultaneously hydrating your thirsty strands. Getting the Most Out of Moisture Miracle Curling Cream Curling cream is almost like a second conditioner and you shouldn’t be afraid to apply it all over strands and really work it into your curls. Unlike conditioners however, creams will provide curl definition and hold which makes them a worthy addition to your natural hair care arsenal. There are an abundance of natural hairstyles you can create with curling cream. We might be biased but we love our nourishing formula to provide deep moisture and radiant shine without weighing down your curls. How to Use Curling Cream For a Wash-n-Go One of the best (and easiest) ways to use a curling cream is for a simple wash and go. Most curl creams can be applied to dry or wet hair which makes the styling opportunities endless, but we prefer using it on very wet strands. Curl creams work best on very wet hair because it allows the product to be applied more evenly. Immediately after rinsing out your conditioner, skip towel-drying and instead, apply curling cream while hair is still wet. If your hair has dried in the time it takes you to get out of the shower, use a spray bottle to rewet the hair evenly first. Using a generous amount of Moisture Miracle Curling Cream, rake (never scrunch!) it through hair with fingers or a wide tooth comb, working the product from your roots to ends. Once it’s evenly distributed through hair, you can gently scrunch out excess water. This method helps you get the best version of your curls since they are smoothest when they’re wet. Once you’ve got your curls fully coated in the cream, don’t touch them too much as they dry, otherwise you might cause them to frizz. Air dry or gently blow dry hair with a diffuser on a low setting, then you can fluff it to your liking. It’s common to use a bit of gel on top of a curling cream that isn’t strong enough, but a defining formula like ours has enough hold to keep your curls in place all day. This curly queen’s video tutorial shows how to properly apply the product and let’s you see the beautiful results. How to Style With Curling Cream While we love a good wash and go, there are tons of other standout natural hairstyles you can get with curling creams. No matter what hairstyle you’re going for, start by following the same steps laid out above for a wash and go. However, when using curling cream to style hair into more intricate looks, rub the cream formula between your fingers before applying to hair and run through with fingers instead of a comb. Then, instead of drying and fluffing your curls, work your hair into your favorite style. One of the quickest is going to be virtually any type of twist. This awesome flat twist out tutorial shows how to use our Moisture Miracle Curling Cream for maximum hold and moisture. For a variation on the wash and go, add a small French braid or a few cornrows on the side of your head for that extra oomph. You can also use curling cream to moisturize and define your curls, then throw them on top of your head into a flirty pineapple puff and leave two strands hanging out above your ears. Whether you’re a curling cream newbie or have bathroom cabinets full of curly hair products, it’s important to remember that the application is almost just as important as the product formula itself. Proper cream etiquette and use will ensure your curls and coils remain free from frizz while looking fly. Happy curling! DISCLAIMER: We endeavour to always credit the correct original source of every image we use. If you think a credit may be incorrect, please contact us at care@africanpride.com
Learn more
African Pride Edge Control | Fast Ways To Bring Your Edges Back To Life
While edges may come and go in mainstream popularity, for black hair beauties, styling your baby hairs will never go out of style. In fact, some of you might be currently missing your edges since (as almost all textured hair girls know) it doesn’t take much to lose them. This is where our expertise comes in, welcome to African Pride Edge Control 101. Most black women know how to style their edges to compliment every look. However, simply brushing them down with a smooth edge hair gel every day definitely doesn’t do enough to help keep them intact. Edges, aka the soft, wispy hairs that frame your hairline, and face are sometimes referred to as ‘baby hairs’ for good reason: they need to be completely babied to thrive. These tiny strands of hair are actually the most fragile thing in your head. Between wearing tight protective styles, harsh weather, using a rough touch when washing or styling, your edges are almost always susceptible to breakage. Unfortunately, almost all our favorite protective styles like braids, weaves, cornrows, and buns feel incomplete when we don’t frame them with laid baby hairs. So what can you do to bring your edges back to life and maintain their health? While there aren’t any magical solutions to help regrow your edges overnight, there are a few simple things you can do to help revive them over time. Making consistent changes to your hair care routine will help not only bring your edges back to life, but help keep them intact for all the cute hairstyles to come. Read on for some fast and easy ways to restore your edges back to their former glory. Protect Your Natural Hair At Night The easiest thing you can do to protect your edges is something you should definitely already be doing: covering your hair at night. If you’re using a regular bonnet, it might be making matters worse. Instead, opt for a silk scarf or a bonnet with a headband attached so that it fully covers your edges and top of your forehead. This secures your full hairline so that your edges are fully protected from breakage while you sleep. No matter what protective cover you use at night, make sure it’s a silk or satin material. This isn’t just to be fancy, silk and satin help your coils and curls remain hydrated and protected whereas cotton absorbs oil and moisture from your hair. For extra edge protection, double up with a pillowcase of the same material to prevent any breakage from friction as you may toss and turn. This step is one of the most important as we aren’t typically aware of how much damage is occurring to our hair at night. Give Your Scalp Some TLC Anything you might do to help your hair grow will help your edges grow too. A great way to care for your scalp and stimulate growth is to give it a comforting oil massage every few weeks. We recommend using our Moisture Miracle 5 Essential Oils blend as it can help reactivate hair follicles to support growth and prevent breakage. It also utilizes Vitamin E, a thickening agent, that repairs hair follicles to help reduce damage. Simply applying the oil will protect and strengthen the hair, but actually massaging it into your edges will stimulate blood circulation and encourage growth. The increased circulation also helps more nutrients reach the hair follicles on the hairline. Gently massage a small amount of the oil blend into the scalp and hairline to moisturize, strengthen, and repair edges. Since stress can also contribute to hair loss, close your eyes and take some deep breaths as you’re massaging. Add it to your weekly hair care (or self-care) routine as a time to unwind, reflect, and release some tension from your mind and body. Take Breaks Between Protective Styles The hairstyles that we love the most, think: ponies, weaves, box braids, and more are the ones that are the toughest on your hair. The purpose of wearing protective styles is to moisturize and maintain the integrity of your hair. Yet, these same styles are especially harsh on your edges because those are the strands that get pulled the tightest. The tighter the style, the more tension is applied to your already fragile edges and the more they are at risk for breakage. This can also happen with the use of glues and wig caps. Any style that is painful, heavy, or uncomfortable is even more likely to be pulling out your edges. You can still wear these styles but it’s best to only do so rarely and with caution, always being conscious of how they pull on your hairline. Your whole head of curls, especially your baby hairs, need time to breathe and heal between protective styles. Give your hair the time it needs to rejuvenate, regrow, and mend the damage that occurred during the manipulation it took to achieve the style. It’s also easier for the hair to repair itself when the damage is recent, so avoid the permanent harm that could happen from too many back-to-back styles. After a few weeks of nourishment and care, the hair will return to its natural state and those edges will be ready to try another protective style. Use Moisturizing Formulas Natural black hair is unique. As such, it requires extra specialized formulas. Curly and coily hair is prone to dryness, meaning your edges are even more brittle and delicate. This makes using moisturizing formulas an integral part of your overall hair health. A simple way to tell if a product has enough moisture to quench your natural curls is whether it’s water-based. You can spot a water-based product by looking at the label and seeing water as the first ingredient, as you’ll see in any product in our Moisture Miracle collection. When pre-pooing, washing, or conditioning, take extra time to gently apply these moisturizing formula to your edges. The hairline is the most vulnerable part of your hair when it comes to breakage and dryness, so be sure to keep it hydrated. Smooth With African Pride Edge Control Gel Styling your edges is an important part of any hairstyle and it’s important they are sleek and tidy. However, handling your edges too much can contribute to breakage and thinning. Constant brushing, combing, rubbing, and pulling will cause excessive and possible irreparable damage to your hairline. Before you style your edges or put your natural hair into a protective hairstyle, make sure you’ve given hair the proper time to care and recover. Then, if you must style your edges, try to use your hands instead and be sure to style them using a moisturizing smooth edge hair gel. For instance, maintain your hairline’s strength and moisture with our Shea Miracle Silky Edges Anti-Frizz Conditioning Gel and Olive Miracle Super Hold & Smooth Edges pomade. These are each made with the best natural oils and extracts that will nourish the hair while keeping it shiny and smooth. While it might take a few weeks to see results, remember that caring for your edges isn’t a race. Slow and steady is the name of the game. Even if your edges grow back strong, if you stop doing all the good things you did to revive them they’ll just become damaged again. Think of edge care the same way you think about healthy eating or exercise, it’s about regularly incorporating lifestyle and hair care changes to your normal routine. We promise it’s worth it in the long run to see stronger, healthier edges.
Learn more
Surprising Reasons Chocolate is a Game-Changer for Natural Hair
When we decided to use chocolate as one of the hero African Pride Moisture Miracle ingredients we knew there’d be at least a few people who’d suspiciously say…chocolate…for hair? Unfortunately there are a lot of hair care products and ingredients on the market that are based purely on fads or internet hacks and not scientific research. Buzzwords and whatever is a current trending topic tends to find its way into the ingredient list of many skincare, haircare, and beauty products. This can make understanding what’s good for your hair slightly more challenging and might even make you a little more jaded when it comes to trusting that the ingredients in your natural hair care products will do what they claim. The benefits of chocolate however, have been recognized for quite some time (think ancient Mayans) for both hair, skin, and overall health. Maybe you’ve heard that eating dark chocolate in moderation is good for your health and thankfully this is true (because sometimes the universe is kind like that). Dark chocolate is packed with antioxidants that work to help keep your immune system healthy and promote good circulation. It also contains a surprising amount of antioxidants, vitamins, and minerals like fiber, magnesium, zinc, potassium, and so much more. Studies have shown that eating small amounts of dark chocolate is also great for supporting your heart health, and helps provide an extra boost of energy. While we all love (or depending on your willpower) hate this sweet treat, somehow using chocolate for natural hair care has flown largely under the radar. Considering all the amazing health benefits dark chocolate has, it seems only natural that it will do wondrous things to your hair as well. How Chocolate Benefits Your Body Dark chocolate is rich in Vitamins A, C, D, and E, plus calcium, zinc, and iron. Some of its compounds may also lower blood pressure, reduce the cholesterol that is bad for the body, and increase the cholesterol that is good for the body. Those affects combined can reduce a person’s risk of developing heart disease. Dark chocolate’s antioxidant and anti-inflammatory properties also soothe the body internally and the skin externally. In moderation and in the purest form possible, chocolate can be good for your body and your soul. Why Chocolate is a Game Changer for Your Natural Hair Dark chocolate is more than just a sweet snack packed with vitamins. Its value is two-fold in its capacity to benefit your body and those curls on your head. Its fatty acids are perfect for nourishing and moisturizing the hair strands, restoring shine and health, and making your curls softer and shinier. Applying chocolate to the hair also increases blood circulation to the scalp, which can encourage your follicles to grow stronger and longer hair while similarly combating hair loss. Those incredible anti-inflammatory properties also help to soothe the scalp and protect it against infection. As we’ve mentioned, dark chocolate is rich in vitamins and minerals. But how exactly do these translate to better, healthier natural hair? Let’s break down the benefits of these further: Antioxidants = Fight free radicals that contribute to aging Copper = research shows this aids in the production of collagen. Phosphorus = prevents hair loss. Potassium & Magnesium = stimulates hair growth. Vitamin A = contributes to thickening and strengthening hair. Vitamin B = encourages growth, shine and hair strength. Zinc = aids in cell renewal, reinvigorating dead or flaky hair follicles. How to Get the Most Out of Chocolate for Your Curls Okay, we’ve established that chocolate is great for our bodies and our hair, so what’s the best way to use it? Instead of applying raw cocoa to your hair, which can be damaging since it’s difficult to find the correct formula of cocoa that’s not overly processed, opt for natural hair care formulas that don’t just include chocolate but harness it’s nutrients to their maximum power. Our Moisture Miracle Honey, Chocolate, and Coconut Oil Conditioner utilizes a combination made specifically to nourish and protect tighter textures, curls, and coils. Coconut oil conditions and helps repair damaged hair while honey naturally retains moisture. The chocolate works to moisturize while promoting healthy hair growth. All three ingredients work together with chocolate’s restorative properties as the star of the formula. Leave on our Moisture Miracle conditioner for 10-15 minutes after washing and let the yummy chocolate goodness transform your hair into soft, shiny, and moisturized curls. Even better? You’ll smell like a dream.
Learn more
Braid Cleanser Hacks: 5 Frizz-Free Tips For Washing Braids
Protective styles, whether you are fully natural or not, are integral to maintaining the overall health of your hair. From twists to braids to weaves, these chic styles protect your curls and coils from heat styling, breakage, and environmental damage while contributing to moisture and length retention. Oh, and they look pretty great too. One of the biggest misconceptions about wearing protective styles however, is that you can just set it and forget it. While putting your curls into braids, twists, or other protective styles will definitely require less daily upkeep, they will still need your care and attention. This is especially true if you’re an active person who goes swimming, works out, or engages any activity that leads to increased sweating (good for you!). Similarly, anyone with coily hair knows that even just being outdoors and exposed to excessive sunshine during the hotter summer months can also contribute to sweaty strands and a drier scalp. We love braided styles year round but especially during the summertime. Braids are relatively low-maintenance and are a great option for protective styling since they can last anywhere from two to eight weeks depending on the style type and your unique hair texture. The misconception however, is that during this time you can skip washing your strands and in doing so, preserve your style and help lengthen the time in-between wash day. Unfortunately, skipping braid cleanser, braid spray, scalp cleanser for braids, and more important maintenance steps can lead to irritation and build-up that causes flakes, dryness, frizz, and the dreaded itchy scalp. We know you might still be a little skeptical (because why should you have to do more maintenance than you absolutely have to?) so read on to learn why washing braids is important to maintain healthy, hydrated, and happy curls. Plus, get five expert-approved tips and tricks for how to easily wash your braids the right way. Why Should I Use a Braid Cleanser? The fear of frizz, breakage, or ruining the protective style that took forever to get just right is what usually stops us from washing our braids. Also hey, sometimes we just get lazy. But it’s a necessary step to ensure tighter textures and curls are effectively protected, healthy, and looking fly now and in the future. Keeping your hair in a braided style without properly cleansing can lead to a multitude of ongoing hair and scalp issues. The biggest problem? The dreaded dry scalp. Not thoroughly cleansing your scalp allows build-up to accumulate on your scalp. Think: sweat, pollution, dirt, hair products, grease, flakes, and other gross stuff. This build-up essentially blocks the hair follicles from natural growth. Similarly, it causes severe itchiness, redness, and dryness. A healthy scalp is important on it’s own, but don’t forget that a healthy scalp is also the key to healthy curls. Pro Tips For Washing Braids While proactive styles like braids are relatively low-maintenance they still need proper upkeep. When considering the best ways to care for your protective braids, remember that your hair is unique. Some textures may be able to go longer between cleansing their curls or some may experience more scalp irritation than others. Find out what care routine is best for your hair type, keeping in mind that 4b and 4c hair types tend to need less washing but typically have drier scalps. Use a Scalp Cleanser for Braids Reaching for your favorite hydrating shampoo might be second nature, but when it comes to washing braids it’s important to update your normal wash day routine. Braids are delicate and it’s important to further avoid anything that could lead to weakening the hair shaft. Also, you don’t want to get your hair soaking wet. Instead, reach for a braid-specialized formula like our gentle Braid & Scalp Cleansing Rinse. The fine nozzle tip will allow you to easily apply the rinse to edges, scalp, and part-lines. Our pro tip? Apply the rinse formula to a cloth and gently massage into the scalp for at least a minute. Once you’ve successfully shampooed (and given yourself a nice little massage) rinse gently with cool water. Your scalp will immediately feel clean, soothed, and refreshed. Never Rub Braids The most important thing to remember when washing any protective style is to focus primarily on the scalp. This is where all the buildup is collected so be sure to concentrate on cleansing this area the most. However, if you want to give your braids a quick rinse, focus mainly on the tops of braids. Using a very gentle touch, dilute braid cleanser with water and softly squeeze into braids. Never rub! Rubbing braids is what leads to frizz and potential breakage. Don’t Skip Conditioner Yes, even with braids you still have to use a conditioner. However, the method you’ll use to condition braids will be very different from how you’d normally do it on wash day. Because we want to be as gentle as possible (and avoid overly-touching or getting braids too wet) there are a few different ways you can approach conditioning your braids. You can repeat a similar method to how you cleansed your hair, focusing mainly on the scalp and gently massaging into hair and squeezing into individual braids. Another effective method is diluting a nourishing conditioner with water and putting in a spray bottle to lightly spritz hair before a quick rinse. Dry Hair Safely This is the step that takes the most patience as wet braids can take a full day to properly dry. Styling braids that aren’t completely dry can lead to some pretty gross consequences like mildew, fungus, dandruff, scalp irritation, and more unpleasant issues. To ensure you avoid these potential issues get ready to practice patience since taking shortcuts will only make things worse. Never, ever blow dry your braids. This will lead to untamable frizz and flyaways. Not to mention that excessive heat use on textured hair, whether in a protective style or not, makes it more susceptible to damage and breakage. Instead, air-dry or gently squeeze hair into a microfiber towel or cotton t-shirt to soak up any excess moisture. Wait until the next day to pull braids up into any style. Moisturize Braids Daily Now that your braids are clean, fresh, and dry, it’s easy to accidentally neglect them until the next wash session. Caring for your braided hairstyles in-between washes however, ensures that your strands stay hydrated, healthy, while also helps to eliminate itchy, dry scalps. For hydrated, frizz-free hair, use a daily Hair And Scalp Sealing Oil. The easy-to-use nozzle makes it a breeze to apply. Simply massage into the scalp, around edges, and gently onto braids. Crafted with Black Castor Oil, tea tree oil and more, this formula helps to soothe itchy, dry scalps while conditioning hair and helping to lock in moisture. Similarly, using a daily braid sheen spray will help add luster while helping to relieve itchiness and the stress of tight braid pulling. Knowing exactly when to wash your braids can be slightly difficult. It can be tempting to leave protected styles in for a long time and become a little lax on upkeep but the most important step you can take in caring for your braided style is to pay attention to your scalp. Your scalp will tell you when it’s time to wash your braids. If you notice increased dryness, flakes, or itchiness for instance, this is a major sign that it’s time to give your protective style a rinse. Just remember to use a gentle touch. Happy washing!
Learn more
Why the LOC Method is the Secret to Your Best Hair Yet
As individuals, we all have our own unique hair care regimen. We have different textures, curl patterns, densities, porosities, environments, budgets, and preferences. While it’s important to find the right methods and products that work for you and your hair type, the one thing we can all agree on is the importance of moisture. Dryness is curly hair’s worst enemy because our delicate strands are inherently prone to it and the potential breakage, dullness, and damage it can cause. Using the tried-and-true LOC method for natural or relaxed hair is an easy yet incredibly amazing way to thoroughly moisturize your thirsty curls and coils. Not only does this popular method give strands a boost of moisture but it ensures your hair stays hydrated longer, especially if you’re going a longer time between wash days. Several African Pride leave-in products in our Moisture Miracle collection are perfect for using with the LOC method. But what products should you be using and in what order? Whether you’re unfamiliar with the LOC method or just want to make sure you’re making the most of your current routine, we’re breaking down each aspect of the LOC method. Read on to see how the African Pride leave-in LOC method is the secret to your best hair yet. What is the LOC Method? This easy 3-step process is one of the best ways to give dry hair of all textures and types a lust boost of moisture and shine, but what exactly does it mean? LOC is an acronym that stands for: leave-in conditioner, oil, and cream. The LOC method is pretty straightforward as the steps and products are already laid out in the name. What separates this method from other treatments however, is that it’s specially designed to give hair the maximum moisture. It’s a rigid routine for a reason. You wouldn’t apply face moisturizer right before washing your face right? Because that would wash away all the moisture you just applied. Similarly, LOC layers products in a specific order to ensure your hair gets the most from each product. Is The LOC Method Right For Me? Some curly queens opt for the LCO, liquid, cream, and oil order instead. The LCO method is generally best for low porosity hair while the LOC method is typically best for type 4 and high porosity hair because it has larger open pores that can absorb more product to avoid clogged follicles. We typically prefer the LOC method for every type of curly hair because adding the oil after the liquid prevents hygral fatigue. Porosity may slightly impact how your hair responds to the LOC method, but it’s still effective at moisturizing any hair type that is prone to dryness. Curly, textured, and coily hair is always thirsting for moisture and the LOC method is a perfect way to keep it hydrated in between wash days. You can do the LOC method every time you do a wash and go style, typically every 1-2 weeks. What Does the LOC Method do For Natural Hair? The LOC method works best for natural hair (though it can also be used on relaxed hair) that’s prone to dryness and struggles to retain moisture. The basic idea behind the method is to hydrate the hair with a liquid, hold the moisture in with an oil, and seal it in with a cream. Each step contributes to keeping the moisture in the hair strands. First the liquid opens up the hair cuticles, which readies the hair to receive moisture. With the cuticles open, the oil can properly penetrate the hair shafts so that they can hold in the moisture. The cream closes the hair cuticle back up, sealing everything in and preventing moisture loss. Keeping the hair moisturized with the LOC method not only makes hair softer and shiner, but it also prevents breakage, dryness, and frizz. How to do the LOC Method Whether you’re a natural hair pro or just making the transition, the LOC method is an incredibly easy routine to learn. The best part? It utilizes products you most likely already have in your cabinet. Let’s break down how to successfully do the LOC method step-by-step Step 1: Moisturize With African Pride Leave-in Conditioner The first step in preparing hair to receive all the nourishing benefits of LOC is to apply moisture in the form of water. Water delivers the initial dose of hydration before heavier moisturizing substances layer on top. It’s the job of good natural hair products to successfully retain the moisture that hair gets from water, which is where the next two steps come into play. If your hair is dry be sure to lightly re-wet it with water or do this step when you’re fresh out of the shower. Then with your hair clean and wet, gently separate into sections. Generously spray each section with leave-in conditioner. Make sure to show extra love to your ends as they’re typically the driest and most susceptible to breakage. To deliver the most moisture to the hair, use a moisturizing, water-based leave-in conditioner. It might seem obvious, but to ensure the product you’re using is water-based check the ingredient list. Water should be the first item listed. You can find this in our African Pride Moisture Miracle Leave-in Conditioner. This mixture of liquids will open the hair cuticles to prepare the hair to continue receiving moisture from the rest of the products. Step 2: Seal in Moisture With Oil There is a wide variety of oils out there that have different benefits, but some only sit on top of the hair while others penetrate the hair follicles. Penetrating oils help the hair to maintain moisture by sealing it into the hair follicles. Coconut oil and olive oil are two oils found in our African Pride 5 Essential Oils blend that also bind with internal hair proteins to fully nourish the hair with all the benefits of each oil. The coconut oil will also help to reduce protein loss during your next shampoo. Apply a thin layer of the oil blend to each section of the hair until you coat your whole head. Be sure not to go overboard as you don’t want to leave your curls looking greasy. This thin layer coats the hair shafts to keep them moisturized and it soothes the hair cuticles to help the moisture from the liquid infiltrate the hair strands. Step 3: Lock in Moisture with African Pride Leave-in Cream The final step of the LOC method is to close the hair cuticle back up with a creamy moisturizer that locks the hydration into the hair. Sealing the hair cuticle is the most important step in preventing hair from losing moisture. The cream should be something heavy like our Moisture Miracle Coconut Oil & Baobab Oil Leave-In Cream. The natural ingredients in this conditioning cream help hair to retain moisture but they also don’t prohibit it from taking in additional moisture if you need to rehydrate before your next wash day. Apply a generous amount of styling cream to your hands, rub them together, and smooth the formula into your hair from roots to ends. The coconut oil and baobab oil protect against breakage and strengthen the hair with tons of nutrients. The moisture your strands need gets absorbed and the remaining product leaves your hair with a protective coating against the environment. This final layer of product ties everything together to keep your curls defined, manageable, hydrated, and strong. The LOC method is not only meant to be a hair care routine, but also a style. All of our Moisture Miracle products are made to highlight the individual natural beauty of your curls to keep them cute, healthy, and bouncing until your next wash day. DISCLAIMER: We endeavour to always credit the correct original source of every image we use. If you think a credit may be incorrect, please contact us at care@africanpride.com
Learn more
Braid Spray + More Easy Ways to Make Your Protective Style Last Longer
It’s that time again. The time when you have wash-and-go’d your natural curls way too many times this month and you’re tired of cleaning an entire wigs worth of hair out of your shower every week from detangling your curls. Once you are over trying any of the supposedly “easy” hair tutorials online and you and your hair simply need a break, it’s time to opt for a protective style. Our long beloved box braids, twists, plaits, and lace fronts come back to us like a warm hug. These protective styles allow our hair to rest from the constant manipulation of daily styling and can even guard our hair from environmental damage. If cared for properly, they can even help your hair grow in length too. You might think that using a braid spray is enough maintenance as long as it has some nourishing ingredients like the extra virgin olive oil and tea tree oil found in our Olive Miracle Braid Sheen Spray. There is so much more, however, that needs to be done in order for a protective style to really benefit textured hair. It must be properly installed, maintained, and removed in order for it to protect your curls and coils instead of damaging them. We’re breaking down everything you need to know about each of these steps in order to ensure your tresses are in their best shape yet. Pre-Installation Care Many protective styles have a long install time, so you’re likely planning it at least a few days ahead. In the days leading up to your install, ensure your hair is ready for the entire process. Do a Deep Penetrating Conditioner Moisture Restore Treatment that will infiltrate the hair strands and strengthen them before they are manipulated into a protective style. Distribute the product evenly from roots to ends, detangle, cover the hair with a plastic cap, and apply moderate heat for up to 30 minutes before thoroughly rinsing. Since your hair won’t be properly washed for an extended period of time while it’s in the style, make sure your hair is fully free of any product build-up before installation. Reach for a hydrating yet effective pre-shampoo like our Moisture Miracle Aloe & Coconut Water Pre-Shampoo to best prep the hair to get the most out of your usual cleansing. Starting with a clean base, especially a clean scalp, helps your hair to stay healthy through the duration of your protective style Correct Installation and Braid Spray Before applying your style, begin with a Prep & Leave-in Moisture Butter. This blend of black castor oil, shea butter, and jojoba oil prepares the hair for extended styles by providing long-lasting hydration. Keeping your hair moisturized in the style will help encourage growth and prevent frizz. If a stylist is doing your installation don’t be afraid to communicate when it feels too tight. A tighter pull will make the style last longer, but it’s not worth damaging your natural hair and your precious edges in the process. Your protective style should not be so tight that it’s giving you headaches. If you’re doing the job yourself, opt for an Extra Hold Braid, Loc, & Twist Gel that works hard so that you don’t have to pull as tightly. The style that you choose should also work for your particular hair type. For instance, if you have weaker hair, avoid jumbo or extra-long styles that are heavier on the head. Smaller twists or braids require less hair and last longer anyway. No matter the style however, it’s best to leave out your edges. The hairline holds the most delicate strands of hair and tightly pulling them into a protective style is a recipe for breakage. Leave your edges be and simply style them with a nourishing edge control formula. Once your install is completed, finish with our lush Olive Miracle Braid Sheen Spray to soothe and nourish hair. Continue using as needed to relieve any itching and prevent breakage. Moisturizing Protective Styles While your hair is tucked away inside a style, it still needs a bit of help to stay moisturized. Curly and coily hair is prone to dryness so it’s important to be regularly moisturizing the hair to help it fight breakage. Water is one of the best moisturizers for hair, so to get extra nourishment use a water-based product. Using products that contain water as a primary ingredient will help prevent heavy product buildup. Follow your leave-in conditioner with a blend of natural oils to seal moisture into the hair strands. You can either apply directly or mix a nourishing blend of oils with water in a spray bottle. Keeping Your Natural Hair Clean It’s obviously difficult to thoroughly wash your hair while it’s in a protective style, but we have to do our best otherwise the buildup will undo its great benefits. Use the moisturizing products and braid spray regularly. If your scalp starts to get itchy, flakes start appearing, or you feel greasy product buildup, then it’s time for a quick wash. Use a braid cleanser to gently clean hair without causing frizz. Apply to the scalp along your part lines and massage with your fingers or a cloth until clean and then rinse with water. A wash will soothe the scalp, refresh the hair, and help the style last longer. Continuous Protective Hairstyle Maintenance To extend your protective style you can go as far as to redo the perimeter of the hair if you have braids or twists. After about a month, you should see enough growth along your hairline and nape for a touch up. This will give the rest of your hair more time to rest and grow by keeping it in the protective style for longer. Similarly, whenever you manipulate the style into a bun or ponytail, be sure to coat your hands in a small amount of 5 Essential Oils to avoid any friction that would cause frizz and breakage. Continue to delicately care for your hair to keep it healthy and moisturized underneath the protective style. Learn to Love Your Curls in Any Style Once it’s been about eight weeks it’s time to return your hair to its regular state. Besides the dirt, grease, and product buildup in your scalp, keeping a protective style in for too long can also cause excessive breakage, tangling, and dryness. Don’t get impatient and roughly tug the hair out but instead, take your time and use a deep conditioning mask to gently remove buildup and knots without breaking or shedding. Once your hair is detangled, cleansed, and conditioned, admire your natural texture and curls and coils that are so amazing. Don’t let anybody tell you that just because you like to switch it up means you love your curls any less. Go ahead and rock any look with confidence knowing that your natural hair is beautiful no matter what shape it may take that day. It’s versatility is part of its strength, just like you. DISCLAIMER: We endeavour to always credit the correct original source of every image we use. If you think a credit may be incorrect, please contact us at care@africanpride.com
Learn more